Create a post
To learn more about the purpose of posts, go to the Posts: focusing on a current topic of local interest tutorial.
Create a new post:
1. Log in to your website and click “New”, “Post”.
2. Add the title of your post under “Enter title here” ![]()
If you want to schedule the post to publish at a future date:
3. Go to “Publish” on the RHS and click ![]() . Change the publish date and time and click “OK”. (“01:00” is 1am).
. Change the publish date and time and click “OK”. (“01:00” is 1am).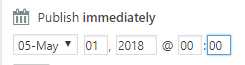
If your post is being shared via an email campaign, be sure to set the publish time early enough so that it is already on the website before the email is timed to go out. I suggest “01:00” for any email campaign.
To make it a featured post, so it appears on your Homepage:
4. Tick the “Sticky” box on the RHS.![]()
Update the category and add tags:
5. Tick the relevant category under “Categories” on the RHS.
6. If you want to include “Tags” (searchable phrases that you want your post to be found for), insert the relevant tags under “Tags” on the RHS.
For more information about tags, go to the Posts: using tags to bring relevance tutorial.
Upload your featured image:
7. Click “Featured Image” on the RHS, then click “Set featured image”. The “Featured Image” screen will appear. Upload your image by dragging and dropping it, then click ![]() .
.
You may need to resize your image before loading if it is too large or if it needs to be a set size, such as for a Homepage slider. Go to the tutorial Resizing an image.
Update the SEO keyphrase:
8. Optional: Scroll down and add the Focus keyphrase for your post under the “Yoast SEO” section. This helps Google identify the topic of your post.
Update the Excerpt:
9. If required, add an “Excerpt” on the RHS.
Excerpts are mainly used when your post is being shared via an email campaign. If no excerpt is added, the email campaign will show your entire post. This looks messy.
Autopost to Facebook:
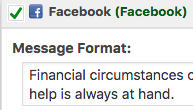 10. If using the Facebook Autopost plugin, scroll down and tick the “Facebook” button under “Autopost to”. Add your Facebook introductory text under “Message Format”.
NB: This will share to Facebook as soon as your post is published. It is recommended that the image is loaded onto the post at least 24 hours before the post is published, otherwise it may not appear on Facebook.
Save before going into Elementor (page builder):
If you’ve created a scheduled post, it’s a good idea to save what you’ve done so far before you go into Elementor. However, if you don’t need to use the page builder “Elementor” you can skip this step.
11. Click ![]() . (You may need to click it twice.)
. (You may need to click it twice.)
Build your post content:
12. Build the content of your post. You can either:
(a) Type straight into the box 
(b) Use a page-builder template in Elementor. This is useful if you want your posts to conform to a standard layout that has already been configured. Go to the Using a page-builder template tutorial.
Save and Preview your post:
13. Click the ![]() or
or ![]() button. (You may need to click twice. If you skipped the “Scheduling” steps the button will appear as “Publish”, otherwise it will say “Update”.)
button. (You may need to click twice. If you skipped the “Scheduling” steps the button will appear as “Publish”, otherwise it will say “Update”.)
14. Click on the ![]() button to view the post. Be sure to check that all hyperlinks work correctly.
button to view the post. Be sure to check that all hyperlinks work correctly.
Remember that only 5 deep links are allowed on your website to articles on JSH-Online. See the JSH-Online Permissions page for more information. (TeenConnect is free to access).